Setting Up Your Mac For Local Development Using Coda, WordPress & MAMP
WordPress is not just for blogs. WordPress is a highly sophisticated content management system that you can use to develop and manage your client’s professional websites. Best of all, it’s entirely free. To get started it helps to experiment without the hassle of publishing files to the Internet. With a Mac, you already have the basics for an excellent local development environment.
In this tutorial, I will describe setting up a folder on your Mac that you can use to practice building websites with PHP and a MySQL database. Before we begin you will need
- a Mac
- a text editor
- a web browser
Let’s get started.
1) Download WordPress from WordPress.org. Unzip it to find a folder called “wordpress”. Rename it YOUR_PROJECT_NAME (Mine will be called “jay”). Drag it to the Sites folder in your Home directory. For easy access, I’ve added the Sites folder to my Finder window sidebar.

2) Download the free MAMP software from Mamp.info and install. MAMP stands for Mac, Apache, MySQL and PHP. This app helps manage our MySQL databases in a straight forward way.
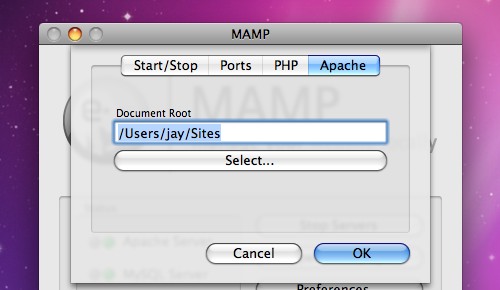
Open the app and click “Preferences…”, then select the “Apache” tab to select our Document Root. We want to select the Sites folder located in your Home folder. The path should read /Users/YOUR_MAC_OS_X_USER_SHORTNAME/Sites.

Once you activate MAMP and get the green lights, test if it is working by opening your browser and going to http://localhost:8888/ You should see the contents of your ~/Sites directory. Remember, we’re preparing a local development environment. “Localhost” means your computer, so no one else in the world will be able to see these files in their web browser.
Okay, MAMP is working, and the MySQL is just waiting for us to give it some database tables. Go to http://localhost:8888/MAMP (must be all uppercase) and click “phpMyAdmin”. Once there, “Create new database” with YOUR_PROJECT_NAME. My database name will be “jay” to match my project.
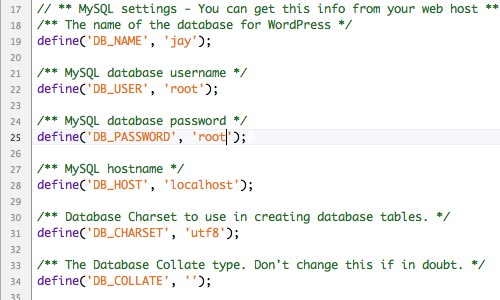
3) Now we just have to match WordPress with the database. Access the YOUR_PROJECT_NAME folder in ~/Sites and rename the wp-config-sample.php to wp-config.php. Open the file to edit the content. DB_NAME means database name, so enter YOUR_PROJECT_NAME. The DB_USER and DB_PASSWORD are both “root”. Leave “localhost” as the server, as the server is our local computer.

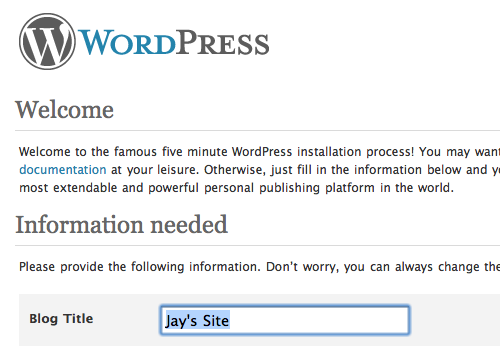
4) Visit http://localhost:8888/YOUR_PROJECT_NAME and you will see the famous five minute WordPress install. Set up the blog name and email, and you will be given a password. (I copy and paste this generated password to get into WordPress, then change it to something easy to remember right away. I use the same simple password for all my WordPress development sites, since they are not live on the Internet.)

WordPress is now configured to work on your computer, but will only be accessible locally. The final step is to set up Coda to access the directory.
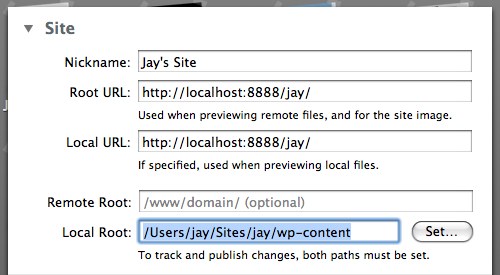
5) Go to Coda, enter Sites view (Command 1) and “Add Site…”
- Nickname
- YOUR_PROJECT_NAME
- Root URL & Local URL
- When developing locally, this will simply be used to generate a thumbnail for you to see your project in Coda. These can be the same URL, e.g. http://localhost:8888/YOUR_PROJECT_NAME
- Remote Root
- None
- Local Root
- You may use the “Set…” file browser to find your project folder in the Sites folder, or copy and paste this template: /Users/YOUR_MAC_OS_X_USER_SHORTNAME/Sites/YOUR_PROJECT_NAME/
- Connecting, Terminal and Source Control
- Do not worry about these. You do not have to configure them for local development.
